
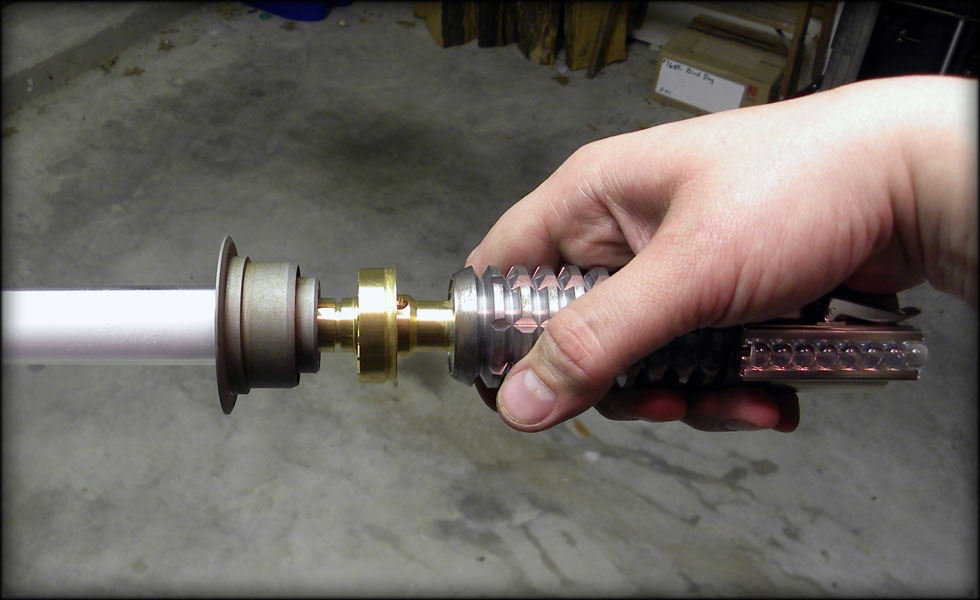
I don't have the anchoring screws in the emitter yet but this already feels so great to hold. It looks so much better than an MR saber already, and I can tell there's no wobble in the blade, and it will be much moreso when I get it all screwed down.
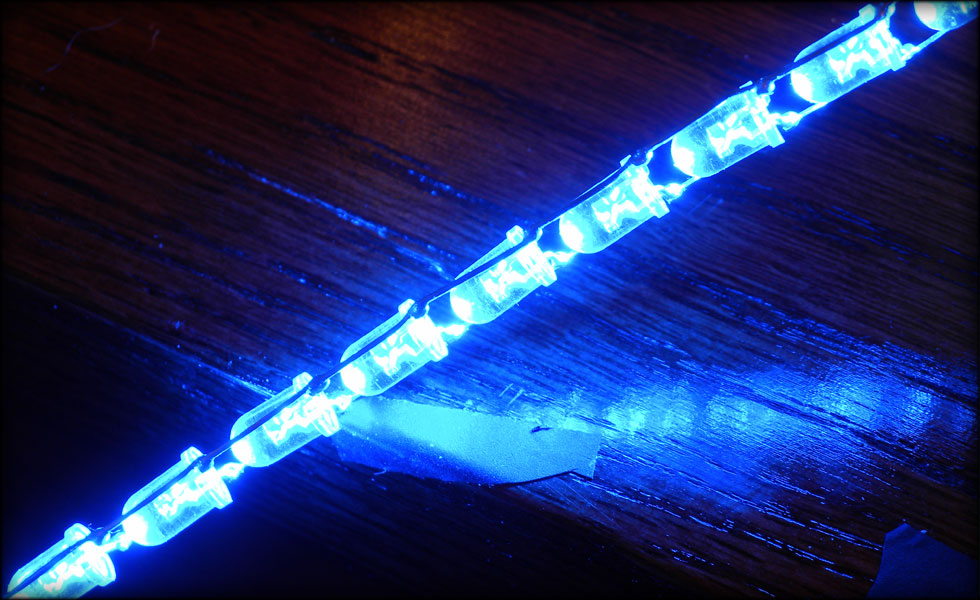
The first ten LEDs in the ladder string soldered. That was tedious.
A closeup of the soldering job. I bent the leads over the next LED in the chain, crimped, and snipped the excess, then a very small bead of solder to secure it together, while keeping everything as straight as I could.

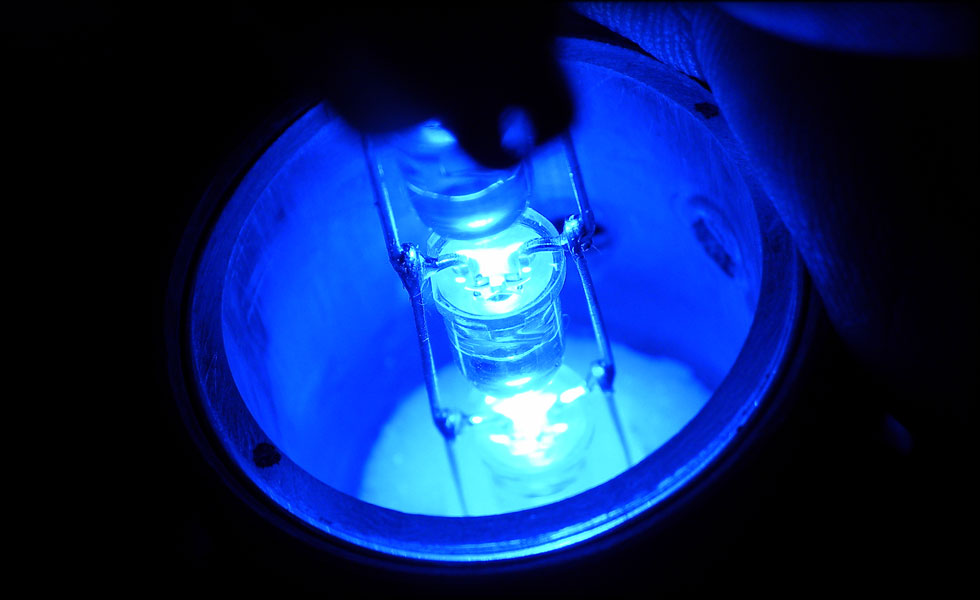
Preassembled for wire length and fit, and just so I could see what it looked like lit up. I think once I get the LED string moved a bit closer to the emitter to get rid of that slightly dim spot at the base, and the other 54 LEDs soldered up, this saber is going to be one I am very happy with.

I decided to do a little work on this project, I found a scrap piece of delrin to attempt the battery holder/speaker housing, and it turned out to BARELY fit. Three AAA batteries fit inside the delrin tube, which is threaded at the end for the sink knob pommel, and widens out to 1 inch to hold the speaker, with enough room for a resonance chamber behind the speaker to pump up the volume a good deal. The graflex clamp fits snug on that wider spot, with cuts for the tabs to lock in. I'll probably go back and make this piece out of aluminum for stability.

The obnoxious switch hanging out of the top of the graflex clamp is temporary till I figure out how to hide a switch in there. I am very happy that I was able to cram all that stuff into such limited space, and still hold true to the accuracy of the saber. I did have to harvest the pommel off my original saber to test, but I think I can come up with a suitable replacement.
The saber is BRIGHT and LOUD, moreso than a stock master replicas Force FX saber. I will wait till I have a bit of extra cash and finish out the LEDs in the blade, and then it will be time to weather it to match my first saber.
And now we come to the finishing of the steel parts. First off, I needed to strip any rust off the grenade. There was some light surface rust, and I used a wire brush in my dremel to shine it up for bluing.

I'll be using Birchwood Casey Super Blue on the grenade. This will be the first time I have tried this particular product.
If you do this, make sure to use rubber gloves and do this in a well ventilated area. This is some noxious stuff, so it's not for kids.
That white residue is bad news, I blast it off with some high pressure cold water.
This site is part of the nonentity network. Not associated with LUCASFILM LTD.™ or any LFL Ltd.™ Film or Franchise.