

Now you see why I have this round PCB from radio shack. After buzzing out only the threads from this end of the grenade on the lathe, this PCB fits right into the recess.

All said and done, it will be a (hopefully) foolproof design, clean and simple, and easy to get apart and back together for any maintenance.
My order for batteries and speaker should get here wednesday, or sooner. And I hope to be done with this guy by next Monday.
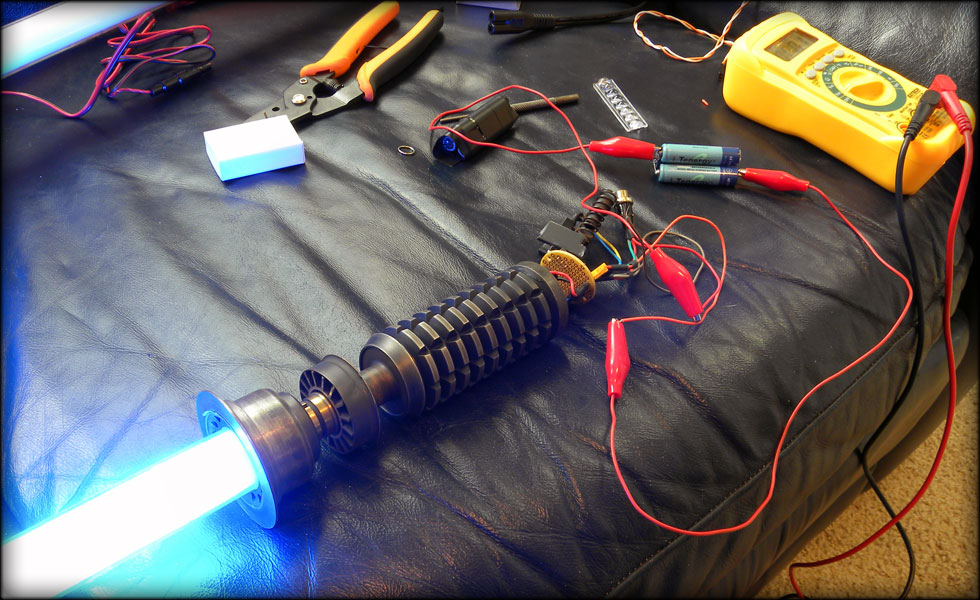
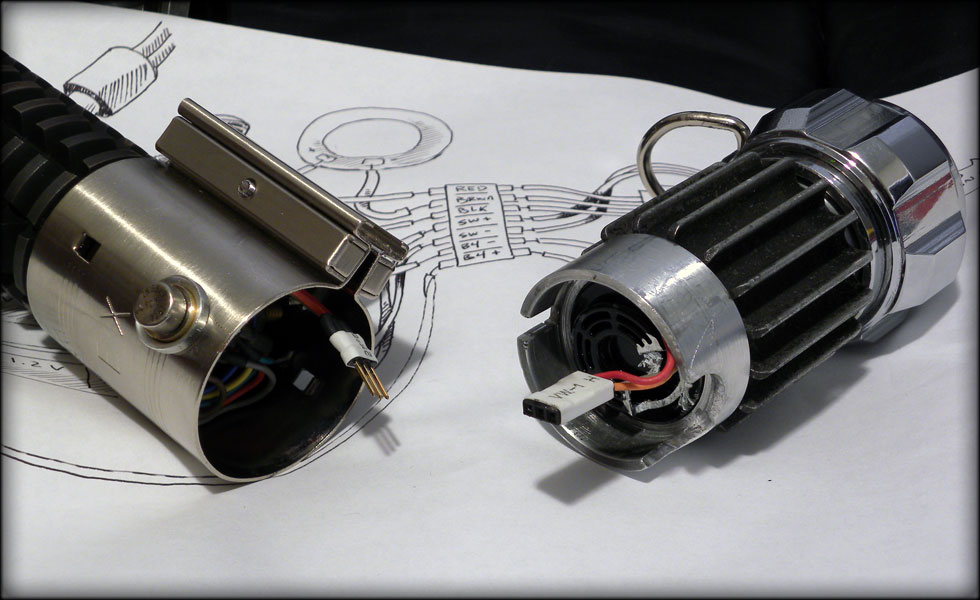
I need to know if this is correct as far as wiring goes...
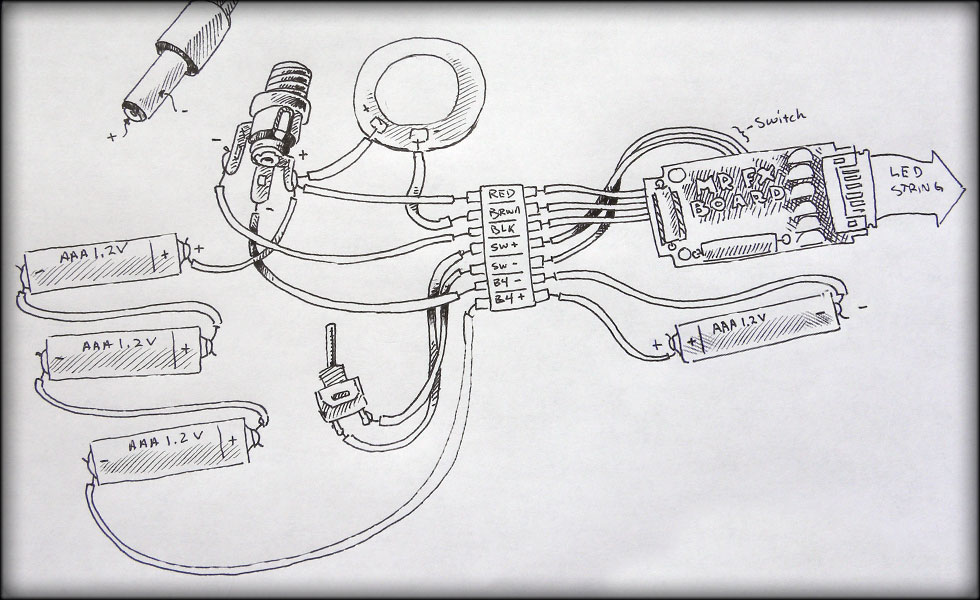
Apparently this works just fine!

Here's a minor update, maybe not so minor. I got one of my transistors installed tonight...
"But wait, sloth, isn't that kind of boring? Don't you have something else to show for yourself?"
Why yes, why don't you pull that transistor out. Give a firm tug.
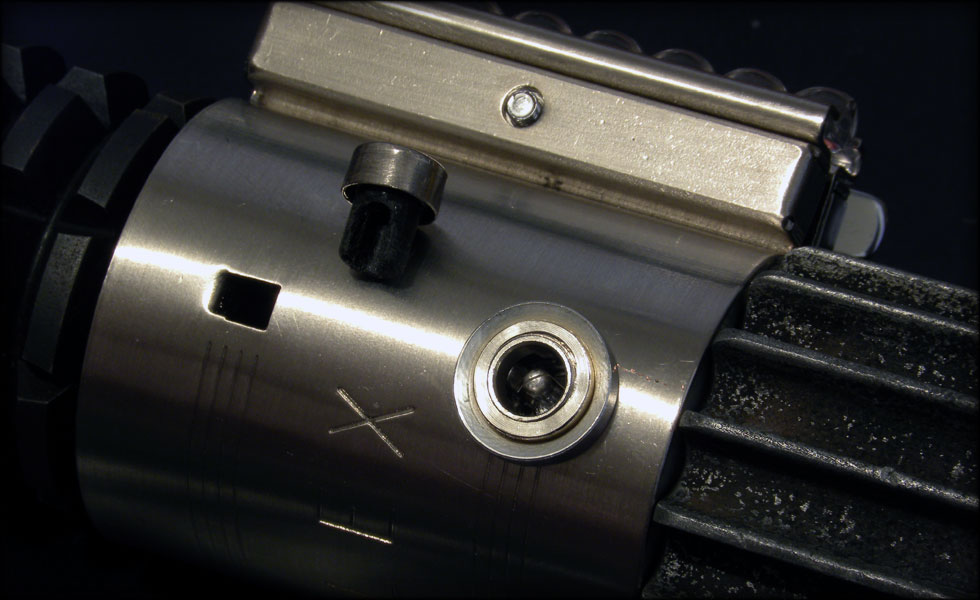
That's right, it hides the recharge port. I found a vintage transistor, hollowed it out, shortened it, made a non conductive plug out of delrin, and glued it on the inside of the transistor cap.
Yes, I know if I plug it in there it will act as a killswitch, that's why there's a slot on one side. It is a killswitch if I turn it 90 degrees, and not a killswitch if I insert it with the gap over the switch terminal on the inside of the port.
I also lathed down the nut that came with the port to fit inside a groove I cut into the transistor washer I got from someplace.
Eagerly awaiting my replacement batteries, I am meticulously soldering and insulating all my connections.
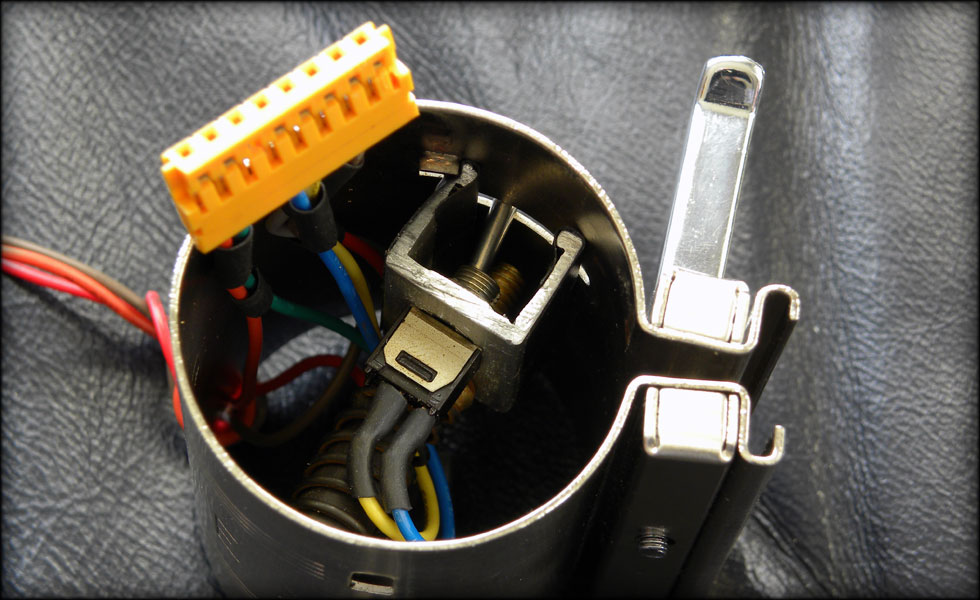
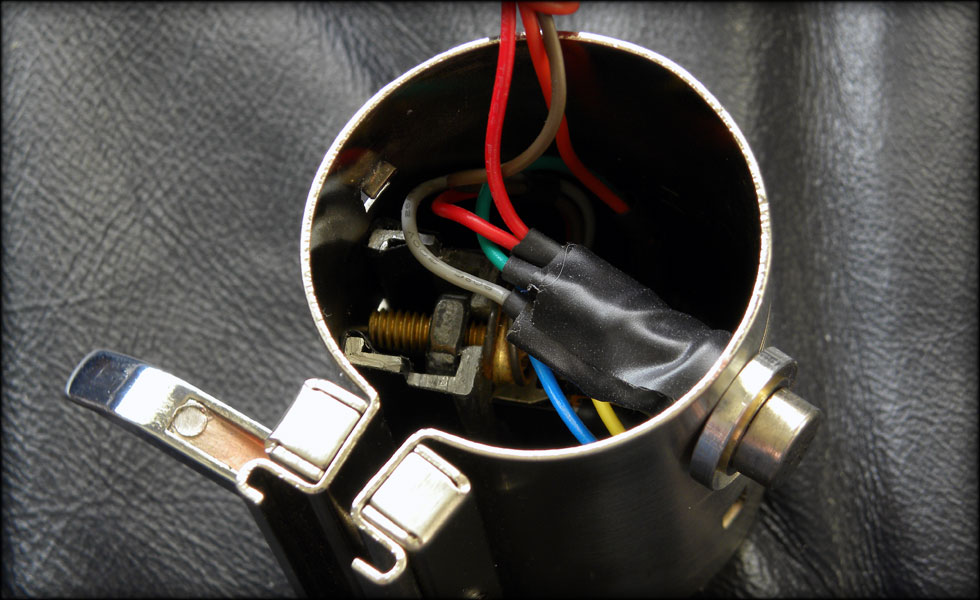
Internal wiring update!
I got everything squared away, unfortunately no batteries arrived in the mail today, so I wait yet again. But here's my completed internal wiring setup...Everything is trimmed, soldered, heatshrunk and electrical taped. In that order.
There is just enough slack in the wiring to allow the wide plug to come out enough to be able to get hold of for plugging into the grenade section, but not so much wire that it binds up on anything once it's plugged in and set back into the clamp.
Today, I got my batteries in the mail and quickly soldered them together to test to see if all the rest of my electro-fu was good to go. Turns out at this point, so far, it was!
Here is the result of tonight's work. heatshrunk and insulated the batteries, hollowed out the battery compartment a few thousandths of an inch to compensate for insulation thickness, ran a new plug between battery pack and control box, made that plug out of several others ( I wanted the colors to match, so I interchanges the crimped connections inside the plug till I got what I was looking for) I also used the stock MR speaker grille, cut it to fit the inside (so the charge port doesn't touch) and made sure all that was nice and snug.
And, set my wires a certain way so that they are retracted when the saber is assembled, but extend when it's not, it's sort of an S coil around the switch, so that when you pull either plug, the wires extend, when you push them in, they retract, keeping everything nice and neat.

And the CHARGING CIRCUIT HASN'T CAUGHT FIRE YET! I think I am home free, folks. We're doing a smoke test (ha) right now, but it's not hot, smoking, smelly, etc.
This site is part of the nonentity network. Not associated with LUCASFILM LTD.™ or any LFL Ltd.™ Film or Franchise.